Sunday, April 26, 2015

Tutorials: Flower Headbands Made with Fabric and Dies

With an "Anything Goes" theme this week at the Simon Says Stamp Monday Challenge Blog, I decided to make some snazzy floral headbands (great for babies and kids) using fabric and some floral dies.

I like a more delicate headband style, so the bands are all made with 5mm elastic that I picked up at Hobby Lobby.  The flowers on the teal headband were cut with an Original Sizzix die I've had forever called, Flower Layers by Emily Humble.  You can still find it online here and there.  The pink one is made with the Tim Holtz Tattered Florals die and the orange one is made with the Sizzix 3D Flowers die.

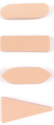
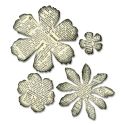
The process is the same for all of the bands.  I started with some fabric scraps, which I cut into flower shapes using my Sizzix Big Shot and dies.  The trick to getting the dies to cut through fabric is to throw in an extra "layer" in your die sandwich.  I included a sheet of cardstock on top of my top layer to give it more tightness and ensure a clean cut.  My die sandwich went as follows: bottom cutting plate, die, fabric, top cutting plate, piece of cardstock.


I cut out a few flowers in different fabrics and arranged them in a clustered row.  One note of caution is that if you use cotton fabric like I did, there's nothing to keep the edges of the flowers from potentially fraying a bit over time.  This doesn't bother me since I like that type of look, but be sure to use felt or some other non-fraying fabric if you like a cleaner style.


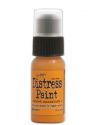
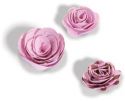
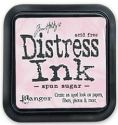
I wanted some of the flowers to have a bit of dimension, so I got out my Prima Esplanade flowers, which come white, and sponged some Spun Sugar Distress Ink onto the petals' edges.


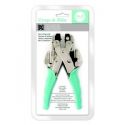
I also quite enjoy tulle, so I pinched together a bit of it and cut a hole in it using the Crop-A-Dile.  I threaded a brad through the tulle and stuck it through my Prima flower.


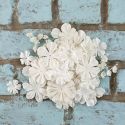
Now that I had all my components, I glued them together (fabric flowers to each other where they overlap, then the Prima flower with the brad on top).  I used a glue gun to make life easy.  Next, I flipped my flower grouping over, cut a piece of white felt, and hot glued it to the back of my flower grouping to give it more stability and structure.


I prepared my elastic by cutting it to the right length (around 17 inches to allow for a bit of overlap and to ensure it wouldn't be too tight), and then sewed it together.  The elastic comes in different colors and I used pink elastic for this headband.


I put my flower cluster on the bottom, then glued my elastic to it, then glued another piece of felt on top to cover where I'd stitched the elastic together.  It would be more sturdy if I'd sewed the whole thing together, but I've never had any problems with the hot glue not holding up.


I flipped it back over and wah-la!  Instant cute headband!  


Here's a picture of the teal one being modeled by the cutest little person in the history of ever (in my totally unbiased opinion, of course).  And thanks to my amazing photographer friend, Amy, for this fabulous pic:


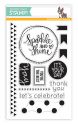
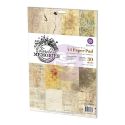
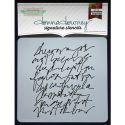
Here are the supplies I used for my headbands, which you can find at Simon Says Stamp:


It is indeed "Anything Goes" week, so there's no reason not to throw your hat in the ring!  Upload a picture of your creation to the Simon Says Stamp Monday Challenge Blog and you'll be automatically entered in the weekly drawing for a $50 voucher to Simon Says Stamp!
http://www.simonsaysstamp.com/

Sunday, April 19, 2015

Tutorials: Calendar Bulletin Board

"Due Date" is this week's theme over at the Simon Says Stamp Monday Challenge Blog.  I decided to make a bulletin board calendar to keep track of my deadlines:


For me, I just needed something big and visual with deadlines noted.  I didn't include days of the week or the month because I didn't want to fuss with changing it every month and because I figured I usually know what month I'm in (that's the hope anyway).  I wanted it to be permanent so that all I had to do was move the due date markers for the current month's deadlines.  So here's how I made this bad boy:

I started by punching out what seemed like millions of white paper circles with a 2.5" circle punch and coloring them with various shades of Distress Ink using sponges and the mini blending tool.  Monotony Factor?  10+.


After the backgrounds of my circles were colored, I added splotches of Distress Stain and more smears of Distress Ink.  To get these splotches, just hold the Distress Stain bottle above your paper and smack it vertically down without angling it.  The splotch is created!  The harder the smack, the further those "spider leg" edges will fly.  Note to self: not a good day to wear a white shirt.


I decided I wanted more variety to my circles, so I made some with stripes by fingerpainting lines across a piece of paper with Dina Wakley's acrylic paints.  Then I punched more circles out of my home-made striped paper.  For future reference, this was ten billion times easier and faster than doing each circle individually like I'd done with the other circles.


Once my circles were moving along, I stamped a wonky circle around each one using Ranger Jet Black Archival ink and Simon Says Stamp's "Sparkle and Shine" stamp set.


Here are my circles awaiting their exciting next step!


I bought a bulletin board that was 17" x 23" (ish) and glued sheets of Prima's "Timeless Memories" paper to the bulletin board's surface.  I decided my circles needed a little more depth, so I inked around each one with some Ranger Jet Black Archival ink, smudged some extra here and there, and laid them out of my bulletin board to get a rough idea of the spacing. 


I glued each circle to my background and laid a couple of heavy books on top so they'd dry flat.  While my glue was drying, I made the "due date markers."  I did this by cutting some banner flags, covering them with Washi, cutting out some Tim Holtz butterflies, and attaching them to some circle-wound clusters of black Prima wire thread.  I added the words "Due" with some Tim Holtz label letters.


Now that my glue had dried, I cut numbers out of black vinyl (1-31 to accommodate any month) and Tim Holtz's "Word Play" Sizzix die.  My husband was the one who suggested black vinyl when I was whining about having to glue on every single number and I must say that it worked brilliantly!!!  Just like stickers!

I did some stenciling and more ink-smearing on the background of my board to give it some more oomph, then I added a push pin to the top of each circle so I could hang the due date wire circle over any upcoming deadline days.


I've been enjoying my new calendar and haven't missed a deadline since its creation (knock on wood).  And hey, if it ever stops functioning well as a calendar, I figure it could double as a crafty game of ring toss when the creative juices aren't flowing!

I used all sorts of goodies on my calendar, which you can buy at Simon Says Stamp:


This week's theme is a great one, so I can't wait to see how you put it into action!  Upload a picture of your creation to the Simon Says Stamp Monday Challenge Blog and you're automatically entered to win the $50 voucher to the Simon Says Stamp Store.  You do not want to miss the due date on this one (see what I did there? Wink).

http://www.simonsaysstamp.com/