Sunday, September 28, 2014

My Cards and Tags: Thanks

http://www.simonsaysstamp.com/
Apparently I have another addiction besides Ferrero Rocher chocolates.  I knew about the Ferrero Rocher problem, but I didn't know I was addicted to polka dots until a friend perused my blog and said, "Wow.  You really like polka dots, huh."  It was one of those statements that could be taken either way (kind of like when someone says to you, "That's a really bright dress," or "That's a really short haircut,"), but I'm choosing to take it as a compliment and embrace the fact that I'm a polka-dot-aholic.

So when this week's theme at the Simon Says Stamp Monday Challenge Blog was "finishing touch stamping," I knew that polka dots would fill the bill since I always seem to end up stamping them on my projects somewhere.  Here's a Thank You card which I finished with polka dots:


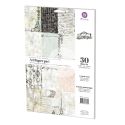
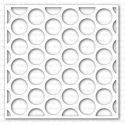
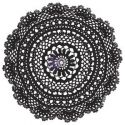
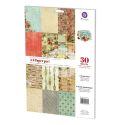
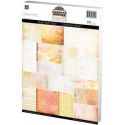
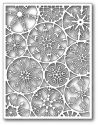
This card was pretty easy to make because I took advantage of some fabulous patterned paper from Prima (their new Cigar Box Secrets line).  I then cut out a snowflake panel using Memory Box's Mod Snowflake background die.  I cut the snowflake circle shapes apart and adhered them to the edges of my card.


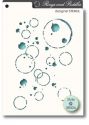
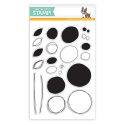
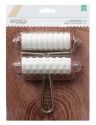
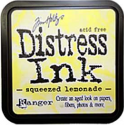
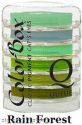
I dabbed on various Distress and Colorbox inks to color my circles and my background a bit, then I added my polka dots!  Lest you think I'm totally predictable, these polka dots were added with a polka dot brayer this time, which was a cool new tool I hadn't tried before.  I rolled it across my ink pad, then rolled it across my paper.  The tool comes with two rollers: one with polka dots and one with stripes and it was a lot of fun to use.

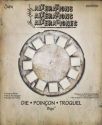
I added a "thanks" made by a Simon Says Stamp die, inked around the edges with brown and black ink and called it a day.

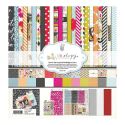
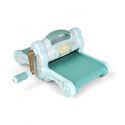
Here are the supplies I used, available at Simon Says Stamp:


So what is one of your favorite "finishing" techniques for stamping?  Can't wait to see what you share on the Simon Says Stamp Monday Challenge Blog.  Upload your creation for a chance to win $50 to the Simon Says Stamp store.  That could buy a lot of polka dots!
http://www.simonsaysstamp.com/

Sunday, September 21, 2014

My Other Creations: Color Book

http://www.simonsaysstamp.com/
STAMPtember continues and this week's stamp-tastic theme at the Simon Says Stamp Monday Challenge Blog is Stamp and Stencil Fun.  I used plenty of both to create my inspirational Color Book (with a fully functional rotating color wheel on the cover).


I wanted to make a book that celebrated color and that focused on a different color for each page.  I also wanted to have a visual reference for some of the different Tim Holtz Distress inks, stains and paints.  So I made each page represent one Distress color, which is named on the tab at the top.  I typed the Distress color names on my computer, printed them, cut them out, then inked them with the corresponding color.


I went to the hardware store and tried to non-conspicuously grab every paint swatch possible.  I picked paint swatches that roughly matched the Distress colors.  I got long skinny swatches to act as my top tabs/page dividers.  I glued the color label to the top.


Next I got bigger swatches for the pages.  I got out my Distress paints and dabbed two or three colors of paint onto each paint swatch, then blended the paint together with my finger.  Then I spritzed them with a generous amount of water and rotated the paint swatches so the paint would swirl and drip.  I let them dry overnight.


With my backgrounds finished in a variety of different color palettes, I added some stenciling using the same main color that I'd painted with.  This blue page is made with Salty Ocean paint and ink.


Next I added some stamping:


I paper-clipped my Salty Ocean tab to the back of the page and it was done!  Now I have a quick visual of Salty Ocean, some coordinating color possibilities and a background pattern idea for another project.


Here's another example page, this one for Ripe Persimmon:


To finish off the book, I tied several strands of various yarns and ribbon to the side.  It's so fun to flip through for inspiration and to remind myself of all the gorgeous colors in the world.

Just one note of caution when working with these paint swatches.  I discovered that their shiny, plastic-like surface makes them NOT idea for certain brands of spray inks (Dylusions) and Distress stains.  I was going to include them on my pages, but when I sprayed on some Dylusions, it beaded up all weird and wouldn't ever dry.  The Distress stain did dry eventually, but it still beaded oddly and didn't cover smoothly.  But the Distress paints worked great on these surfaces!

I used about every color of Distress paint, stain and ink on this project, so I won't list them all or it would be a two-foot section of supplies.  But here are some of the other main supplies I used for this project that you can get at Simon Says Stamp:


I can't wait to see what you create with stencils and stamps this week!  Don't forget to upload your clever creations to the Simon Says Stamp Monday Challenge Blog for your chance to win a $50 voucher to the Simon Says Stamp store.
http://www.simonsaysstamp.com/

Sunday, September 14, 2014

Tutorials: Water Stamping

http://www.simonsaysstamp.com/

STAMPtember is in full swing at Simon Says Stamp!  This week's challenge at the Simon Says Stamp Monday Challenge Blog is "Rock the Techniques"!  The technique I'll be sharing is a version of Water Stamping, which I saw online by the talented M. Carmen Sanchez (aka Cuchy).  Here's my finished project, along with a step-by-step of how the background was created:


Start by covering a piece of watercolor paper (or other sturdy paper) with Gesso.  Rub different colors of Distress Ink across your surface, straight from the ink pad.


Spray some water onto the Distress Ink to help it blend together, then let it dry.


Using ink blending tools or makeup sponges, add more Distress Ink to random areas where you want the color intensified.


Here's what it looks like after I rubbed on various colors of Distress Ink:


Pick a stamp (clear, rubber or mounted on cling film) and paint it with water, then stamp it onto your colored surface.  Here I'm using a Prima doily clear stamp.


The wet stamp will remove color wherever you stamped it down (see the faded white doily image)?


This was my first experimentation with water stamping and it worked okay, but I found that it works much  better with simpler shapes.  So I tried it again on the same background with some scribble circle stamps and they stood out much better!


I cut my collage down to size and finished off the background with another stamp from Paper Artsy that had some text:


Once my background was complete, I stamped on some more text (black ink) and added a girl and a cupcake image.


I added a stamped sentiment and some great tickets from Fancy Pants.  I love the banner at the top, too, which is a Simon Says Stamp exclusive die.


Water Stamping is a lot of fun and is a nice alternative to heat embossing with white powder to create that white effect.  Give it a whirl and see what you think!

Here are some of the products I used from Simon Says Stamp:


I can't wait to see what techniques you'd like to share with us!  Upload your projects to the Simon Says Stamp Monday Challenge Blog for your chance to win $50 to the Simon Says Stamp store!
http://www.simonsaysstamp.com/