Wednesday, July 30, 2014

My Other Creations: Fabric Scrap Recipe Book

Hooray!  This post marks the completion of a project I've wanted to do for-e-ver!  You know how I love to craft with fabric scraps, right?  Well, I wanted to create some sort of book where I could store and refer to my favorite fabric scrap combinations.  My problem was that I could never decide on what type of notebook to use.  This problem was solved when I picked up this fabulous Cinch kit recipe book from We R Memory Keepers/Lifestyle Crafts.

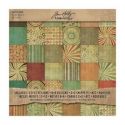
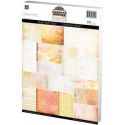
And here is my finished project (cue triumphant music):


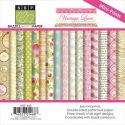
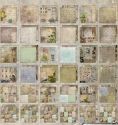
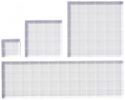
"But wait!" you say.  "I thought you said this kit was for a recipe book!"  Indeed it is.  But let's be honest; I'm just not the cooking type and never would've utilized the recipe pages for anything culinary. So I figured those pages could be for "fabric scrap recipes" instead.  Here's what one of the inside pages looks like:


Each page holds a different fabric scrap combo so I can remember what combinations I like, have used in the past, or want to use in the future.  So handy!!

And yeah, I know I've turned my pages vertically instead of keeping them horizontal (I'm such a rebel)!  I also made one other change to the kit and that was to swap out the silver spiral wire it came with for a gold one I had in my stash.  I didn't do this on purpose; I just had a disaster with the silver spiral wire in which it was destroyed (long story), so the gold was my substitute, but I liked how it turned out in the end.

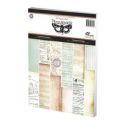
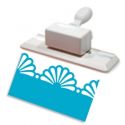
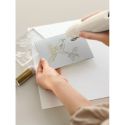
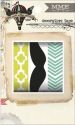
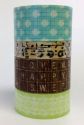
Here's a close-up of the cover, which I made with patterned paper, watercolors, ink, stencils and Washi tape.  I made the faux Washi tape strips with dies from the fabulous Tape It Kit.


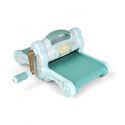
Keep in mind that to make this kit work for you, you'd also have to have the Cinch book binding tool (or make a friend who has one).  But hey- it's a great reason to buy the Cinch if you haven't yet.

I'm just happy to finally have a place to keep my favorite fabric scrap combinations!

Sunday, July 27, 2014

My Other Creations: Jenga Word Blocks

The Simon Says Stamp Monday Challenge Blog encouraged us to be inspired by the letter J this week.  I was struggling until I was re-organizing a closet and came across our Jenga game.  Ding!  I was intrigued by the wooden blocks, but since I'm too lazy to cut and sand wood blocks myself, I decided to just pilfer a few from our Jenga set.  I made them into word blocks and this set expresses my crafty mood.  I can switch out the bottom block with a different mood when needed.


The ink I used to color my blocks is an amazing type of ink I was recently introduced to called Memento Luxe.  Made by Tsukineko, Memento Luxe comes in the form of spongy ink pads with ink that works on any porous surface, including fabric (permanent when heat set).  So I tried it out on my wood blocks and it worked like a charm!  The thing I like about Memento Luxe is that it has great coverage, rich colors, and the ink actually dries!  No worries of color smearing off my wooden blocks.


These blocks were pretty easy to make.  I measured the size of patterned paper I would need for the fronts, cut out a few pieces, adhered them to the blocks, stamped the words on with black ink and alphabet stamps, then inked around them with Memento Luxe (applied with a sponge). 


Now the only trick is to have an excuse ready when my family discovers the Jenga set is short a few blocks!

Here are some of the products I used that you can get at Simon Says Stamp:


Feeling inspired by the letter J?  Upload your masterpieces to the Simon Says Stamp Monday Challenge Blog for your chance to win the $50 gift voucher to Simon Says Stamp!


http://www.simonsaysstamp.com/

Wednesday, July 23, 2014

Tutorials: Banner Pennants

I had so much fun making my Shakespeare Banner that I wanted to include a tutorial of how I made it.  Since my Shakespeare Banner was already done, I made another pennant for the purpose of this tutorial.  Here it is, along with step-by-step instructions of the process:


Start by cutting a piece of paper in the shape of a pennant.  I used the pennants die from Little B.  Patterned paper that has a subtle pattern works well (mine is from Prima's Finnabar collection).  You'll also need Distress Ink (or Memento Ink works well, too), a water mister or spray bottle, a non-stick craft mat and a heat tool.


Dab the ink pad directly onto the craft mat and spritz it with water.  Because the craft mat (made by Ranger) is waterproof, ink-colored water droplets will form.


Turn your pennant face-down and lay it on the water droplets.  If you swirl your paper around a lot (like you're mopping up a spill) the color will mix together and will turn your paper more of a uniform color.  If you just "dab" the paper a few times onto the droplets without swirling as much, you'll get more of a splotchy look.  I went with splotchy.


Use your heat tool to dry off your wet pennant.  Flip the pennant over and rotate drying each side or your paper will curl up in one direction.  After my pennant was dry, I used Tim Holtz's Splatters stencil and applied ink (the same Distress Ink I used in the last step) with a sponge.  You can use ink daubers or make-up wedge sponges, which is what I use.


Next up was to make the pennant topper.  I used a large edge punch from EK Success to punch a fancy edge in some coordinating paper from My Mind's Eye (Sweetest Thing collection).  You could also use lace at the top in place of a paper edge.


I added some ink to the edge piece I cut and glued it onto the top of my pennant.  Notice I left a flap at the top- that is the portion that folds over so you can thread ribbon through it later.


I was now ready to stamp on some images.  I used Ranger Jet Black Archival ink for this part and used a typewriter stamp from TPC Studios, a crown stamp from Heidi Swapp and a sentiment stamp from Hampton Arts.  I inked darkly around the typewriter stamp's edges but left the middle lighter so that the image wasn't too overpowering.  I also stamped the crown onto the typewriter.


Next I used one of my favorite stencils from The Crafter's Workshop called Mini Paint Lids.  I laid it over my scene and applied black ink to it with a sponge.


Once the circles were in place, I colored them in with more Distress Ink (yellow this time).


I continued to color in various aspects of my picture using Distress Inks and sponges.


I applied another couple of lines of cursive text using The Crafter's Workshop Mini Cursive Alphabet stencil and red/pink inks.  I also added on some strips of Washi tape.  After that, I inked around the edges of the pennant with brown and black ink.


I folded down the top flap of the pennant, taped it down, threaded a piece of ribbon through it and added some Prima flowers.  Wa-lah!  Done!


These pennants are fun to make and are a great way to use up scraps, utilize all your stamps and revive some of those tools (like edge punches) that may have gotten dusty. So dig up your supplies and see what amazing pennants you end up with!

Sunday, July 20, 2014

My Other Creations: Shakespeare Banner

With this week's Simon Says Stamp Monday Challenge theme being "A Mid-Summer" project, I was overjoyed to be able to take it in a Shakespearean direction (cause I'm nerdy like that)!  I decided to immortalize one of my favorite Shakespeare sonnets (number 29) on a banner, with one section of the sonnet written on each pennant.  

Enjoy this post and when you're done, click here if you want to see my follow-up tutorial on how I made these pennants.


I don't know that we can ever say exactly what an author meant when he/she wrote something, but here's how I interpret this sonnet and what it means to me.  

We start off with a person (a man, I imagine), who's penniless and out of luck and views himself as an outcast:

He's such a loser in his own mind that he thinks heaven ignores him and he curses his fate.

He wishes he could be someone who's more optimistic and who has more friends.

He wishes he was more talented or influential and he finds no joy in the things that should make him happy.

He's to the point of despising himself with all of these depressing thoughts, but then he thinks about someone who loves him.

When he thinks about this person's love for him, his whole mind frame shifts to a happier place.

When he remembers that he is loved by someone amazing, he is filled with so much happiness that he wouldn't want to trade places with anyone, even kings.

Call me a total dork, but I think this sonnet is so romantic!  Not only that, but it reminds me to appreciate what I have (such as the wonderful people in my life) instead of wasting mental energy comparing myself to others or wishing things were different.

I used a ton of great supplies on this banner, which measures about 6 feet in length, including a great new pennant die by Little B that has pennants in different shapes and sizes.  The thing I like about this set of dies is that the pennants all have a fold tab included at the top of them, so it's easy to thread them onto ribbon or string.

I thoroughly enjoyed this week's theme and if you want to read the whole sonnet uninterrupted, here's a link: Sonnet 29.

Here are the supplies I used from Simon Says Stamp for my banner:


So how will you be inspired by our mid-summer theme this week?  I can't wait to see what you come up with!  Upload your projects to the Simon Says Stamp Monday Challenge Blog for your chance to win a $50 voucher to the Simon Says Stamp store.  That would be a wonderful mid-summer treat indeed!

http://www.simonsaysstamp.com/